Showing posts with label easy. Show all posts

Friday, July 26, 2013

Friendship Shirts - Tutorial

I'm going to put together a little tutorial of how to make friendship shirts. You've seen friendship bracelets, and necklaces, and rings, and bread, but have you ever seen friendship shirts???


So, I'm always impressed by the bloggers who do these REALLY amazing Step-by-step tutorials for DIY's and I can't even imagine the amount of time it took them to make their item with all the stoping and snapping they were doing; not to mention how long it would take to organize all the shots and directions in their 20 mile long blog post.

To you, fearsome tute-blogger, my hat is off.

But, honestly, I don't need that much direction. So I skip over the tiny steps and leap to the end where I go, 'Oh, yeah, like that', then I run off to the sewing room and whip it up. So, this tutorial is gonna be like that; highlights and bam, your done. :^) If you need more steps, or have questions, I'm MORE than willing to answer anything in the comments below!


What You'll Need:
2 shirts of the same exact brand, style, size, but different colors/patterns

That's pretty much it. Well, besides a sewing machine, pins, scissors and matching thread. But we all knew that!

First off, check the sizing. If it doesn't fit you right, you wont wear it right and it wont look as cute and you wont like it and you just might give up on your sewing skill and chuck the machine out the window... But before you do that! Find a shirt that DOES fit you nice and lay it on top of both shirts to for this project and start pinning. Like this! vv
 
Pin the first shirt, then the second shirt underneath, following the lines of the shirt you know fits and you love because of it. Then you will stitch along the inside of this pinning line [or right on the pin line].

Remember to follow on up into the sleeves if they are larger then the sleeves of your favorite shirt. Then let the line decrease as you near the end of the sleeve.

Above is my two shirts altered to fit me from using a shirt I already love the fit of. [After this I trimmed a 1/4 inch seam allowance and surged the edges to finish.

 
Then I shortened the sleeves to 3/4 length and simply surged them to finish; didn't mess with any fancy finishing and it rolls up cute!

 
Now, fold your shirt in half, making sure the seams line up and it is very smooth. Then cut it down the middle. I did one layer at a time, the first...


... then folded that layer back and cut the second layer. [that way if there was a weird fold on the underneath layer, I wont just cut right through it and mess up my nice straight line]

 
Your shirt should look about like this now. Go ahead and do the same thing to the other one!

 
I almost forgot! Remove the tags before you cut the shirts in two. It will be easier.

 
Now for the awesome part! Take the right side of one color/pattern of shirt, and pin it right-sides-together with the left side of the opposite shirt. {make sure you have fronts to fronts and backs to backs}

 
another shot of the fronts pinned right sides together.
 
 
Don't do this. Due to the slippery satin trim it liked to slip unevenly. This is tacky. Get out that seam ripper and make it right. Even Steven!

 
First shirt done! Still inside out, stitched and surged.

 
Do the same thing with the next shirt and you have a cute shirt and an extra to give to a friend!
 
 
From this...
 
 
...to this!
 

__________________________________
 
Enjoy! Have a great weekend!
Kerry

Tuesday, April 30, 2013

Thin Mint Puppy Chow - And the mystery of Real Chocolate

Pinned Image
Thin Mint Puppy Chow
by ShugarySweets
So, there is not much healty, or natural about this recipe. But I have always had a weak spot for Puppy Chow and I love chocolate mint. This just happened to be a perfect combination, in my humble opinion. And since it was my 25th birthday when I made it [nearly two months ago now], I decided to go ahead and splurge.
 
Ghirardelli large chips, Andes Mint Pieces
 
But the recipe called for chocolate flavored Candiquik as the 'chocolate' base. Which, in case you don't know, is NOT chocolate. [shock]
 
It's just, like, sugar, wax, butter, and 'natural and artificial flavors'. This is not chocolate.
 
Instead, I used Ghirardelli baking chocolate [or any kind of chocolate chips; just check the ingredients, cause the "Chocolate flavored morsels" are not usually chocolate either, you have to be discerning these days to know if your really getting chocolate or some ones cheap idea of chocolate.


The recipe also called for Green's & Black's 3.5 oz chocolate mint bar. I couldn't find that, but found a bag of Andes Mint Pieces [in a bag like the chocolate chips, in the same isle, too]. Since it's a total of 19.5 oz of meltyness in the original recipe I put in about 15-18 oz of Chocolate and about 3-5 oz of Andes Mint Pieces.
 
ShugarySweets suggests melting in a microwave, but since I don't have one, I put it on the stove top, on low heat, melting slowly, and stirring constantly.
 
All Melty! [and smelling AMAZING!]
 
Pour over a box of Rice Chex Cereal [about 10 cups]

 
Just look at all that amazingly real chocolate!


Add 2 cups of powdered sugar...

Toss together, set on a couple sheets of foil/wax paper let set a few and enjoy!


I couldn't find the green M'n'M's that ShugarySweets used, but I got those York Peppermint Pieces and added to the mix. They are minty, and pretty blue and white.
---------------------------------------------------------------
 
Thin Mint Puppy Chow - SN Variation
16 oz Real Chocolate [chips/bakers/etc. Just not 'chocolate flavored' whathaveyou]
4 oz Andes Mint Pieces
10 cups Rice Chex cereal
2 cups pwd. sugar
Optional; m'n'm's, york peppermint pieces
 
Just melt the chocolates together, pour over the cereal, toss in the pwd sugar, spread out and let set 10-20min on wax paper or foil. Add candy. Enjoy!
 
-----------------------------------------------------------------
Have a blessed day!
Kerry

Tuesday, April 19, 2011

DIY Repurposing - Unique Notes

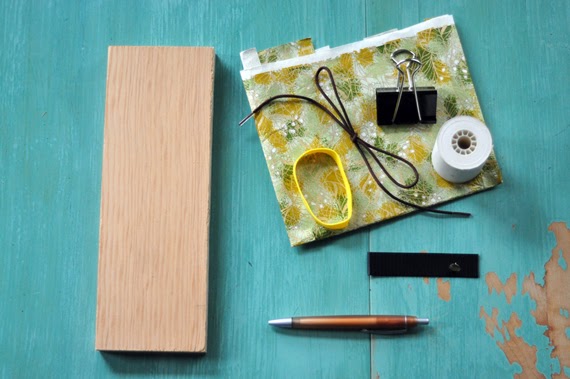
I just read a fun, do-it-yourself, blog post that was featured on the Etsy home page. There is a link you can follow below to get all the info on how to create your very own, one-of-a-kind, handy-dandy note book. [sorry for the Blues Clues reference... I couldn't help it]. The post includes all the information you will need like supplies, and step-by-step instructions to create a unique note pad.
 I'd love to hear what you think of this idea, and if you decide to make your own; you should share pictures the experience in pictures. I have a basket full of wooden spools from thread that I've been saving for something... Now I may have found out what that something is! I'll post pictures if/when I try this. I am always looking for a scrap of something to write on, so this would be perfect for me!
Here is the awesome blog post from the Etsy blogs. How-Tuesday: Make a Hanging Notepad

Have a great Tuesday!

-Kerry