Showing posts with label pattern. Show all posts

Wednesday, June 4, 2014

Early 1700's Gentleman's Breeches - linen

File:Troost Music lover.jpg

There are not many examples easily found of early 1700's breeches. Mainly because of the fact that all images show them worn with the waistcoats of the day, which are nearly as long as the breeches of the time and completely hide those garments! The sleeveless and sleeved waistcoats of that time were just above the knee and were always worn, as it would be inappropriate for a man to go without a waistcoat. {scandalous}

We do know that pre-Rev war, the men's breeches were a French Fly front closure. This is actually more like a modern pant construction than the Drop Front closure of later in the century.

The pockets were fun to do on this pattern! The instructions seemed bizarre, but I just kept following step by step, and it was like magic! Such fun! 

The images below are of a pair of breeches I just finished this week! This heavy chocolate brown linen was fabulous to work with. It along with these beautiful German Silver domed/rimmed buttons are from Wm. Booth Draper. They are a fantastic supplier for all your historical costuming needs!


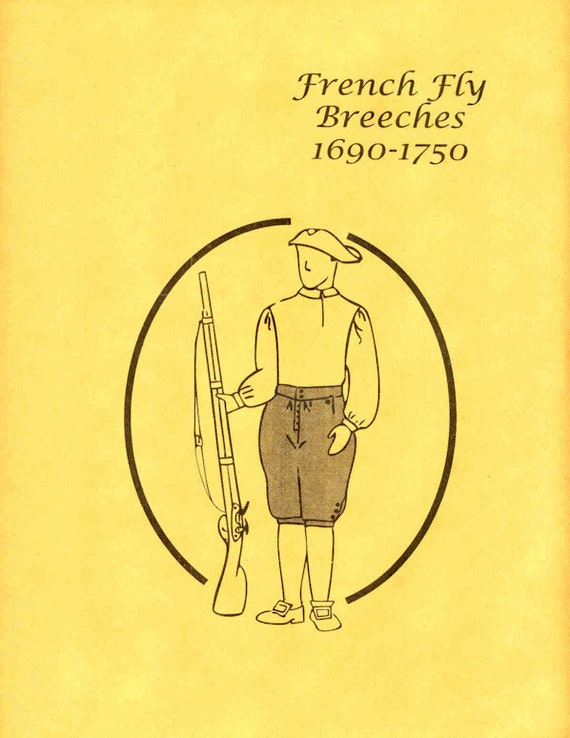

TG123W - 1690 – 1750 Men’s French Fly Breeches Pattern

I used this pattern found on Etsy to make these breeches. I was fairly happy with the pattern, but the directions where a little off. I had to take the project to my historic sewing mentor to figure out several steps, and we kind of re-worded things to make more sense and re-worked parts to make it work properly. Also, most of the steps were using modern construction; so some things were changed to retain a closer authenticity. 

Let me know what you think!! 

Thanks for reading - Kerry

Friday, July 26, 2013

Friendship Shirts - Tutorial

I'm going to put together a little tutorial of how to make friendship shirts. You've seen friendship bracelets, and necklaces, and rings, and bread, but have you ever seen friendship shirts???


So, I'm always impressed by the bloggers who do these REALLY amazing Step-by-step tutorials for DIY's and I can't even imagine the amount of time it took them to make their item with all the stoping and snapping they were doing; not to mention how long it would take to organize all the shots and directions in their 20 mile long blog post.

To you, fearsome tute-blogger, my hat is off.

But, honestly, I don't need that much direction. So I skip over the tiny steps and leap to the end where I go, 'Oh, yeah, like that', then I run off to the sewing room and whip it up. So, this tutorial is gonna be like that; highlights and bam, your done. :^) If you need more steps, or have questions, I'm MORE than willing to answer anything in the comments below!


What You'll Need:
2 shirts of the same exact brand, style, size, but different colors/patterns

That's pretty much it. Well, besides a sewing machine, pins, scissors and matching thread. But we all knew that!

First off, check the sizing. If it doesn't fit you right, you wont wear it right and it wont look as cute and you wont like it and you just might give up on your sewing skill and chuck the machine out the window... But before you do that! Find a shirt that DOES fit you nice and lay it on top of both shirts to for this project and start pinning. Like this! vv
 
Pin the first shirt, then the second shirt underneath, following the lines of the shirt you know fits and you love because of it. Then you will stitch along the inside of this pinning line [or right on the pin line].

Remember to follow on up into the sleeves if they are larger then the sleeves of your favorite shirt. Then let the line decrease as you near the end of the sleeve.

Above is my two shirts altered to fit me from using a shirt I already love the fit of. [After this I trimmed a 1/4 inch seam allowance and surged the edges to finish.

 
Then I shortened the sleeves to 3/4 length and simply surged them to finish; didn't mess with any fancy finishing and it rolls up cute!

 
Now, fold your shirt in half, making sure the seams line up and it is very smooth. Then cut it down the middle. I did one layer at a time, the first...


... then folded that layer back and cut the second layer. [that way if there was a weird fold on the underneath layer, I wont just cut right through it and mess up my nice straight line]

 
Your shirt should look about like this now. Go ahead and do the same thing to the other one!

 
I almost forgot! Remove the tags before you cut the shirts in two. It will be easier.

 
Now for the awesome part! Take the right side of one color/pattern of shirt, and pin it right-sides-together with the left side of the opposite shirt. {make sure you have fronts to fronts and backs to backs}

 
another shot of the fronts pinned right sides together.
 
 
Don't do this. Due to the slippery satin trim it liked to slip unevenly. This is tacky. Get out that seam ripper and make it right. Even Steven!

 
First shirt done! Still inside out, stitched and surged.

 
Do the same thing with the next shirt and you have a cute shirt and an extra to give to a friend!
 
 
From this...
 
 
...to this!
 

__________________________________
 
Enjoy! Have a great weekend!
Kerry

Wednesday, January 2, 2013

New Designs for a New year

Happy New Year! Wanted to share what I've decided to start for this new year.

I am always very inspired by stories. I've thought of designing projects that reflect the stories that I read/see/hear. I wanted to start with a fictional seires that I've really enjoyed, but then I decided to start with True stories. Stories that should be told. If I were to wear something designed with at story, when someone asked me about it, I'd have the opportunity to share that story.
 
I'm reading a devotional book called "the Midnight Bride" by Richard Wurmbrand. It is a beautiful study of the Song of Solomon and a journey with the Persecuted Church, who is, the Bride of Christ. There are many stories of individuals who choose to stand for Christ with the possiblity of death than to deny the Truth that had bestowed upon them true love and freedom.

 
The story I came to, as I was thinking of designing patterns for Real Life Heros, was that of Mary Dyer. Have you heard of her? She was hung in what is now Massachusetts in the seventeenth century because of the calling Christ had placed on her life.
 
As it is stated in 'the Midnight Bride"; "... a law was passed declaring that all Quakers entering the British Colony should be whipped, imprisoned and put to forced labor. Every exiled Quaker who returned was to be hanged. The 'crime' of the Quakers was their belief in an inner illumination, a direct communion with God without the intermediary of clergy or ritual.
"Once such Quaker was Mary Dyer. Though she had been whipped and threatened with death, she repeatedly went to the colony from Rhode Island to visit her brethren in jail. Finally, Mary and two others were sentenced to hang. She attended the execution of the other two, then her hands were tied and black sack was put over her head. But at the last moment, she was reprieved and deported.
"She returned to Massachusetts. She was risking public flagellation and having her tongue pierced with a red hot iron. At her trial she declared: 'If you do not revoke your unjust laws, the Lord will send other witnesses of the truth after my death. Compared with liberty and truth, my life does not matter.' For this, she died. She was a valiant Christian."
 
Mary Dyer
 
After hearing this story, and searching for more info and seeing the memorial statues on this Christain American Hero, I began drafting a shawl pattern to remember her brave actions. From the statue, it kind of looks like she may be wearing a small shawl with some kind of belt to keep the ends in place. This is the basic structure I'm going with for my pattern.

 
I've chosen two types of cables; the first one, and the one that makes up the bulk of the garment is called Simple Chains. It is fitting; A Quaker is bound to a simple life, by the chains of their beliefs. Not that the beliefs of a Christian should ever be compared to chains, for it is by this that we are set free. But, we do serve a master, everyone. If we are not a slave to God then we are a slave to the devil and this world.
The second cable pattern is just called Double Twisted Cable which will go around the neckline of the shawl. This I choose to remember the fact that she was not once on the gallows but twice [double] and it was in this 'twist' of events that God allowed her more time to impact the world around her.
 
 
I hope to update again soon with my progress on this project.
 
Thanks for reading!
Kerry
 

Tuesday, October 4, 2011

Dear Knitting, How I've Missed You!


I've been so busy this summer with school and a new job [not to mention Etsy, family, friends; but you know how that is] that I haven't had much time for making much of anything. Just whipping out a little bag here and there, and making a pair of feed bag shorts [inside joke; will clue you in later if your interested!]. But I have not had time to sit and enjoy the process of 'knit one purl one' and watch with wonder as 'something' emerges.


I recently bought a pattern for button down fingerless mitts from knitter, designer and fellow Etsyian, Lynette McPherson, of Fern Wood Wool Works. The pattern has been fun; not quite a beginners pattern, but no doubt easily understood and well explained. She also designs knit socks, leg warmers and even baby mitts and leg warmers!


All I have left to do for this right hand mitt is pick out some buttons to sew on, weave in the loose ends and ...


... finish the ribbing on the thumb.

Then, on the the left mitt! I can't wait to get started and have these this fall and winter to keep my hands cozy at the drafty feed store I work at. I'll post photos of the completed pair when I have had time to finish them. Thanks Lynette, for the beautiful design!

Have a terrific Tuesday.
Kerry