Showing posts with label fantasy. Show all posts

Monday, February 3, 2014

Dryad - Narnia Costume Profile

I was invited to a super fun birthday party the last week of January. The invitation stated; Please come as one of your favorite characters from one of these books: The Chronicles of Narnia, Inheritance Cycle, The Wingfeather Saga, The Hobbit, Dragons in Our Midst, Lord of the Rings, The Mysterious Benedict Society, or Viking Quest.

Woah. What a fun collection of choices! It was a hard decision, but I've always loved the dryads in the Narnia books and have been looking for an excuse to make this costume anyways. :^)  


I made this waist cincher a week or two ago, with no real plan or purpose for it. But once I began sketching out my ideas for my dryad costume, I KNEW I had to include this lovely to the design.  


I used a metallic gold look leather purse to trim the edges of the front of the cincher, and added little leaf shapes to add interest. 

Seamstress Confession: I use a hot glue gun in my sewing a LOT more than I ever thought I should. [Not, of course for Historical garments]. But I stuck these little leather leaflets in place with hot glue, and then stitched them in permanent place. It can gum up your machine needle if you get to much right along the edge you are sewing, but just tack it in the center if your stitching the edge, and you can avoid this. It keeps it secure better than pins at this point, cause all the thick layers, the pins don't do a whole lot. [or they bend and then are completely useless!]. I've also hot glued patches in place on stretchy fashion fabric or on leather vests/jackets, where it's hard to keep pins straight. 


Here I am below with the birthday girl, who was Bonnie, a Dragon/Human from the books Dragons In Our Midst. 


I just wore the one shoulder 'dress' over a green long sleeved tee and green leggins. 


Here I am with Hope, a Miniature Tauriel, from the new Hobbit movies. [Grace, aka Bonnie, made the Taurial costume!!] 


I made some hair decorations to match the dress and cincher. [ahem; More hot glueness]  


I did some fun viney/leafy paint designs on my face and chest with acrylic paint. 


I added little strips of the same colors of fabric in the dress and leaves and braided them in to my hair, just pinned them to be flowing and twisted them to other sections. 


Thanks for stopping by!!

-Kerry- 

Sunday, February 2, 2014

Paper Project - Map of Alagaesia for the Fantasy Adventurer in all of us!


For week 3 I thought I'd visit a project I completed last summer for a fantasy party we had to celebrate the birthday of the author [Christopher Paolini] of some great books, [The Inheritance Cycle]. 

I created a large map of the world of Alagaseia, the land where Elves and Dwarves have kingdoms, where Dragons live, where Evil Kings rule and are overthrown, and where Eragon learns to become a Dragon Rider with his soul-mate-dragon, Saphira. 
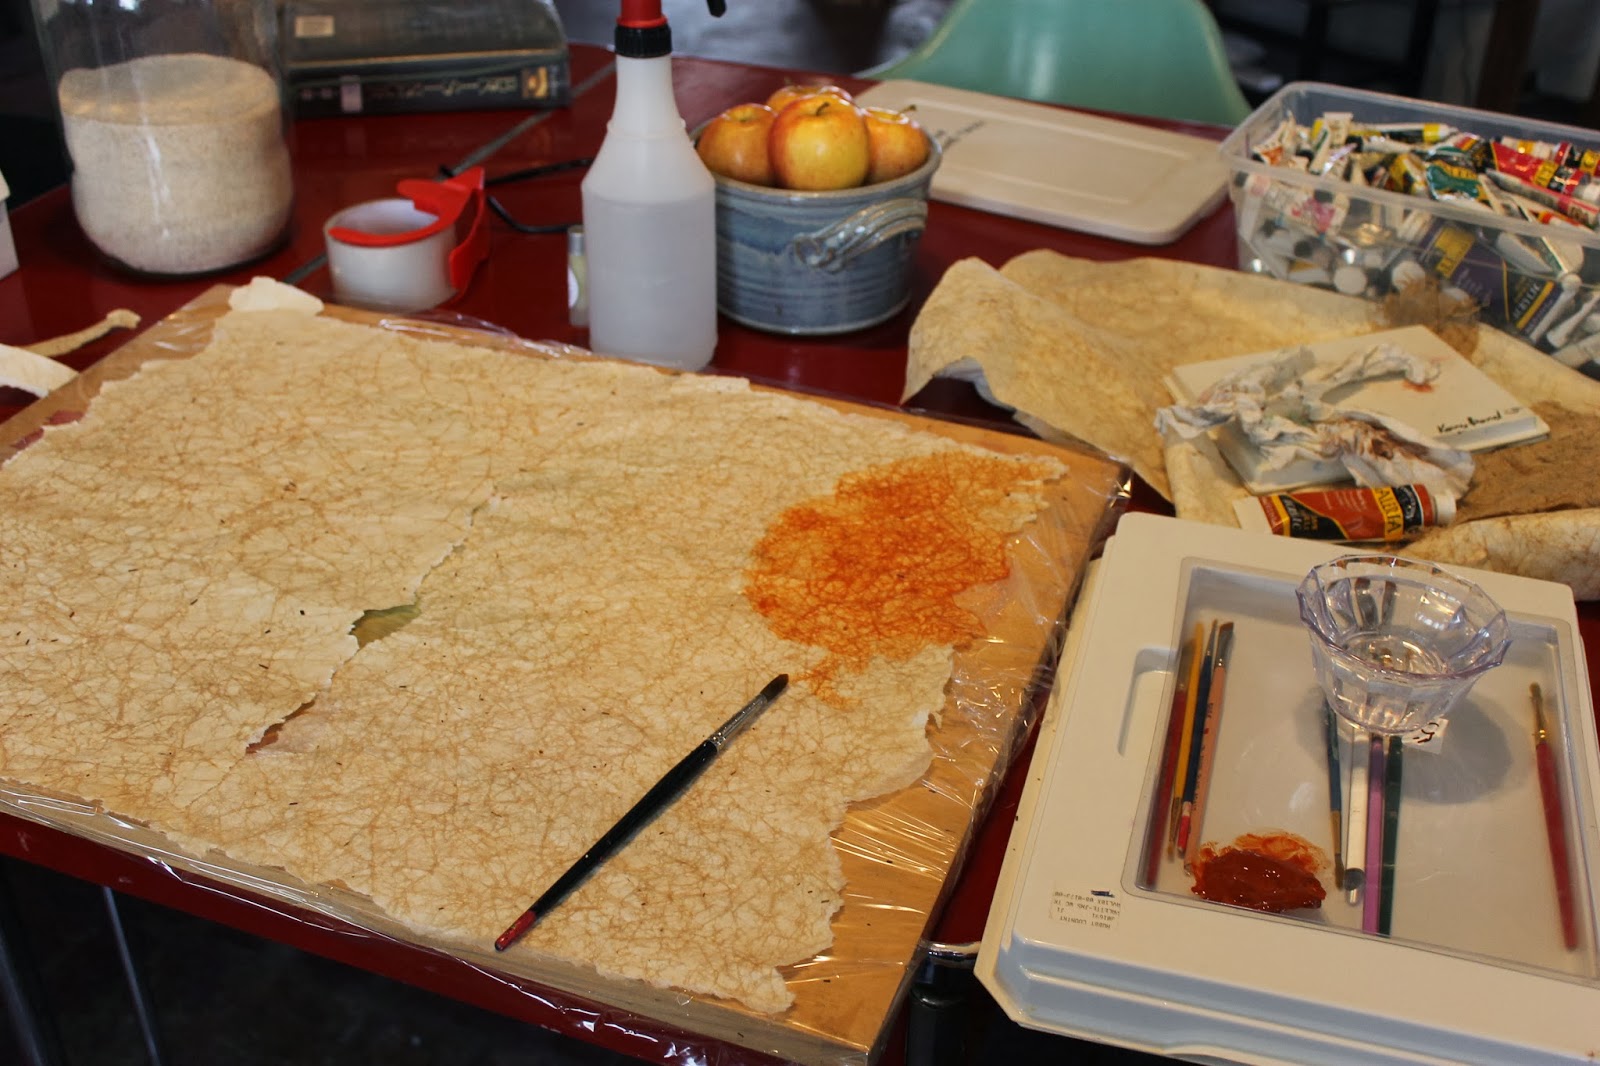
 I took a lot of pictures during the process, here I began with a black and roobios tea blend to age the paper. I made copies from the books to use for added interest. I completely saturated each page, wrung it out, and then flattened it again, not worrying about any tears, and making it very wrinkled. All this adds to the ageing process.


 It took a long time. I did each and every sheet of paper that I used in the map. I photocopied pictures from the book covers and pages from inside, and I used all kinds of textured paper, but primarily just copy paper. 


 I let them drip dry, and then began gluing layers together often while the pages were still damp. If they dried out it was fine, cause the glue softened them back up to be easily adhered to each other. I used elmer's glue mixed with a little water. [I used a wooden board that I usually use to tape down my watercolor paper when I do paintings. This time I wrapped the board in saran wrap to keep the wet glue soaked paper from gluing itself to the wood].


Then I further aged the paper using a very thin wash with water color paints.


These kinds of details were fun to add. The authors name, pages from the book, and the picture of the Dragon Glader to be disguised as the island off the northeastern coast.  


 I used some cardboard to give a dimensional look/feel to the compass design on the map, I overlay this with more distressed paper later. 


The map thus far: 


Begin adding detail locations to the map with watercolor paints.


When I began to add the rivers and lakes at the other end of the map was when I realized that my proportions were off. I had to extend the map long ways or Du Weldenvarden, the Beor Mountains and the Desert would all be way too small comparatively. But I kept painting in details, thinking it wouldn't be too obvious. 


With the below detailing filled in, and checking back to the original map from the books, It was painfully obvious to me that the map was too short. So I wet the paper just on the line in the center where I wanted to add in length, and tore about one whole quarter of the map off the right end.


And added more paper in between with more glue and paint to match the ageing. 


Then I began repainting all the details of the forests of Du Weldenvarden and the Beor Mountains.


I had a photo copy of the original map to refer to constantly. 


Below, you can see how I layered paper around the island of Vroengard over the image of Glader the Dragon. Then while painting in the sea, I outlined rest of the shape of Glader's head and neck in a darker blue then the surrounding sea. So there is a hidden dragon head on the map, included in the island where the dragons and dragon riders all lived during the height of their time. 


Almost complete. Just a little bit of detail work. I added some hand stitched cross stitches to add texture and interest. I used buttonhole twist thread, so it was thick and noticeable.  


 Thanks for your interest!! Feel free to pin or share away. And let me know if you decide to try a project like this, I'd love to see your creative results!

-Kerry-


Thursday, November 7, 2013

Ladies Leather Coat Redesigned

And for my next trick....


I'll take a boring ladies [fake] leather jacket and...


Cut the sleeves off and reshape sides so they aren't so much an hour-glass figure...


rework the front adding darts and pleats creating an asymmetrical closure...


And use the sleeves to make leather lace-up bracers...


And you've got one epic boy's costume. Ready for battle.